Here it is people, the big one! I finally finished everything I can/want to do for Reese's nursery a few days ago. And I'm just pleased as punch with how it turned out!
This is the big picture- what you see from the doorway. The colors for her room are coral, aqua, and gray.

Now I'll take you around the 4 sides of the room and tell about each part. :) Here is first side.

The rocker/recliner was taken from Grayson's room. We bought it off craigslist when we were expecting Gray. It's really big and comfy- perfect for nursing and reading books. I already showed you the gray and white chevron quilt I made that's draped over the back of the chair. It makes me happy to look at it.

I bought 2 pillow forms from JoAnn's {with coupons of course} and then sewed a couple pillow covers for them.

Right next to the chair is big basket that is full of cute girly blankets and the Boppy on top. Best thing ever for nursing in my opinion! I borrowed one for Gray but after using it I knew I'd be purchasing my own for the next pregnancy. I actually bought it at Once Upon A Child {a second hand children's clothing/toy store} so it was only around $10 I think. Then I bought a new cover for it. So much cheaper than a brand new Boopy!

The wall above the bed. I already had the frames hanging up from when I made it a couple years ago. I just updated it a bit for Reese. I spray painted the frames gray, they were black before. And then changed out the paper to go with her color scheme. I also added the print in the middle which I got on etsy. It says, "she believed she could so she did."

The guest bed. At first, I wanted to get rid of it. I didn't think it would work in her room because we wouldn't have enough room for everything. But Josh and I decided we'd try to make it work because we knew we'd have want it when family came for her birth. And then again when Josh graduates in the spring. I'm so glad we did. The room is a bit cramped but we'll only be in this house until May/June. Reese won't be very old so I don't imagine this being a problem.

The sheets, which are gray and you can't see, and the quilt are from Target. The 2 matching pillowcases I sewed, the 2 blue square pillows are from Homegoods, and the front pillow, my favorite one, is from TJ Maax. I love the texture of it!

The second wall.

The curtains. I sewed them- my first time doing curtains. And they're fully lined too! I'm pretty proud of that. I used this tutorial. They close all the way to cover the window and help keep the room dark when Reese is sleeping. And I hung them high and wide so they can be completely open and let in all the light when we want to. :)

It's hard to see how pretty the fabric is from the pictures, so here's a picture of the fabric.


I already showed off the sheets I made. But I still love them! And we have a little bear friend for Reese too. Grayson also has a similar blanket animal lovey thing which he really does love. Hope she does too.

The crib skirt. This was a mostly no-sew crib skirt I did loosely following this tutorial. I love them because when we lower the crib, the skirt is adjustable and can always be made to hang almost touching the floor, or whatever your desired length is.

The 3rd side of the room.

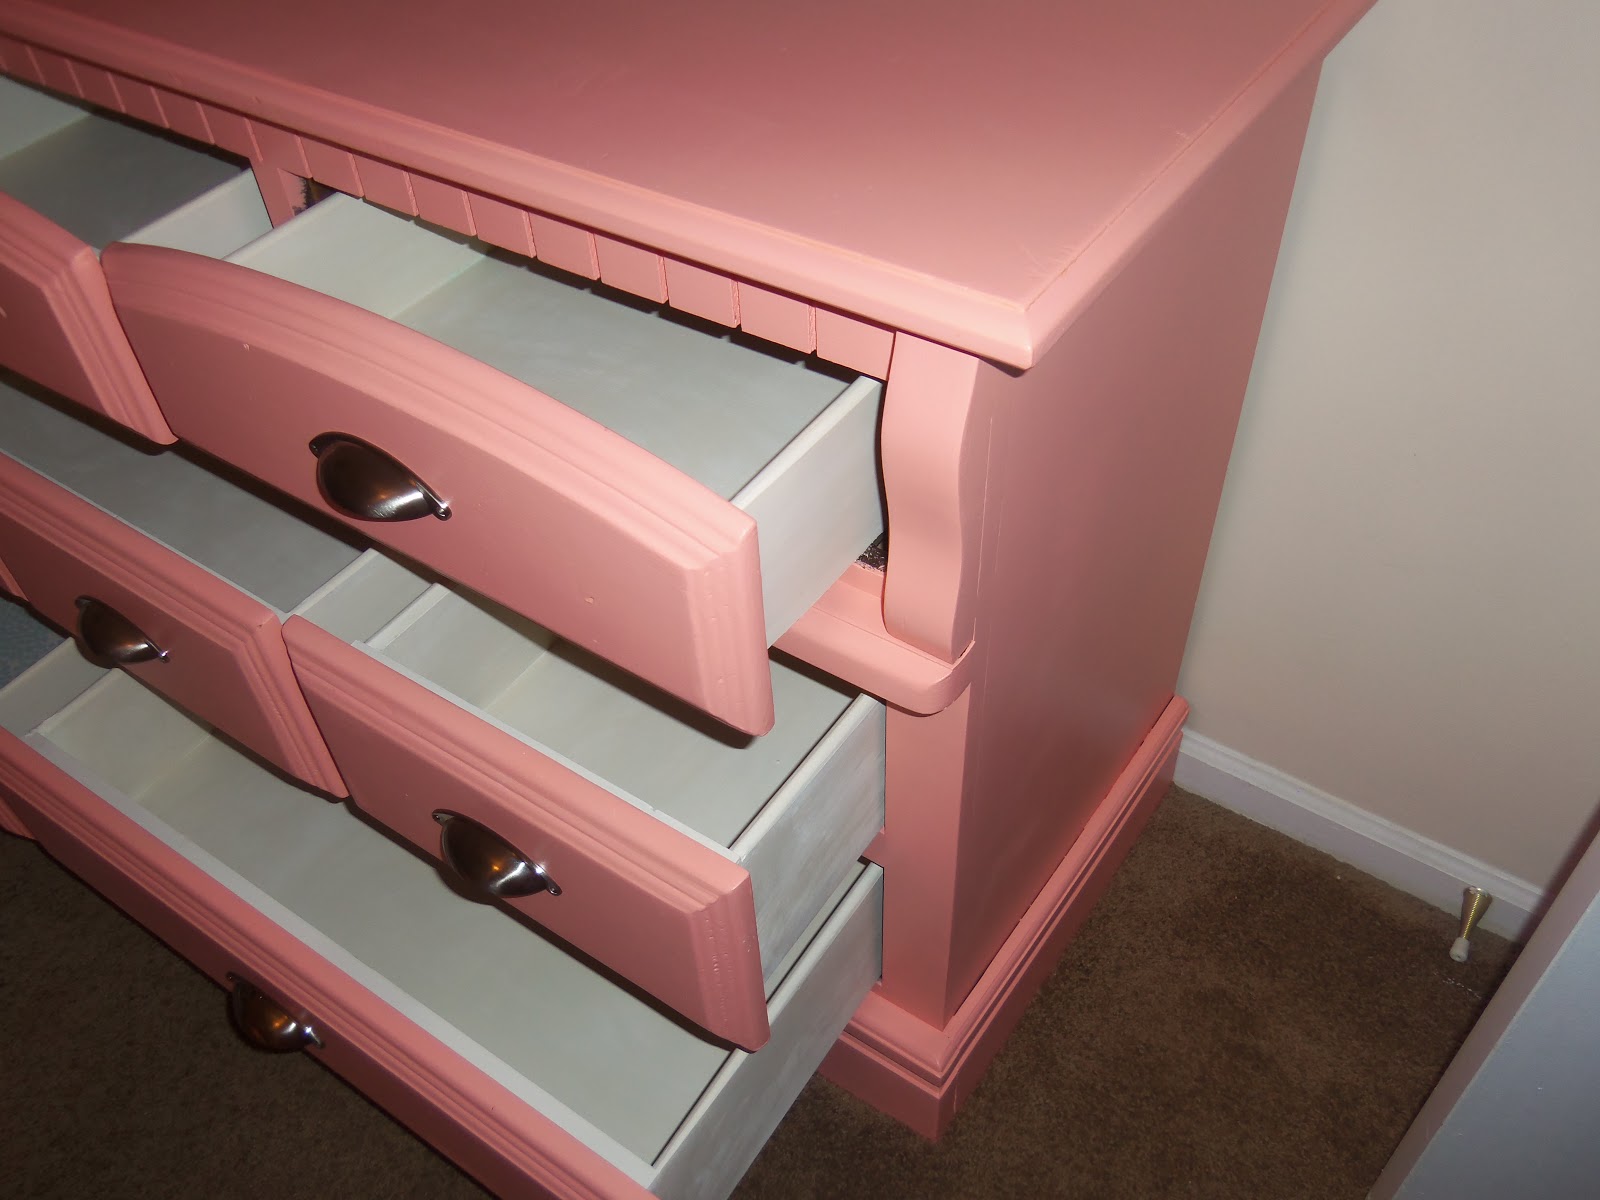
You already read about how I painted the dresser here, so I won't go into details. The actual color of the dresser is more accurate in the picture above. It looks really light in this one below.


And the diaper changing pad with cover which I also sewed. I made two of them. Both with the soft minky dot fabric, but the other cover is gray in color.


The left side of the wall. The sunshine sign and Kentucky print are both from etsy. The Kentucky one has a little heart over Lexington, since that will be her birthplace. :) The frame it's in is from Cut It Out, where you buy the frames unfinished {so it's cheap} and then paint them yourself. The other 2 will have sweet baby pics in them soon. :)

The right side of the wall. The vintage xylophone toy was a flea market find. It was fun to add something unexpected to the wall! The frame to the right of it will have baby pictures soon.

The "R" and embroidery hoop were both quick and easy little crafts I did. No more than 1-2 hours max. Closer to an hour I'd say. I just wrapped a letter "R" we already had laying around with gray yarn and then made a felt flower to clip on to it. I had everything on hand for this so free! The hoop art was something I'd seen on etsy but knew I could replicate for much cheaper.

Here is another frame I got from Cut It Out and painted aqua blue. The print is from etsy and it's my favorite one on the wall!

Dark gray frame from Target and the print is from, you guessed it, etsy. :) You can custom request what colors for the letters "I love u" and so of course I chose coral and aqua.

The last wall. Not too much going on since there's the door and the closet. But I did what I could with the small space.

The bookcase. I bought in off craigslist and refinished it. I sanded it down really well and stained it a darker color than it had been. Then I used some spray polycrilic to seal it. It's a pretty small bookcase, but its the perfect size for the spot it's in!


On this shelf we've got a Melissa ad Doug bead maze, more little toys in the basket, and books.

On the bottom, mostly books and then an adorable crocheted elephant a good friend made for me, well Reese I guess. :) Oh, and the owl bag in the back is for diapers, a changing pad, and such. It wont stay there, just for now.

Above the bookcase is a frame I've had forever that I got on clearance at Bed, Bath, and Beyond. It was black with words on it. I knew at the time I'd paint them (yes, I bought 4 cause they were so cheap and I loved the chunky frame). Two of them were painted when I was expecting Gray and are currently hanging in his room with his newborn pictures in them. I painted this one for Reese with leftover paint from her dresser- Coral Reef by Valspar. I love that they have the same frame.

Above the doors I hung the cutest little vintage inspired alphabet bunting ever! It was a gift that my sweet bloggy friend Ali made, who I met for the first time a couple months ago when were in California. Thanks Ali, I love it! It looks so perfect in here. :) I think it adds a lot to this wall that otherwise would be pretty boring with just the frame.


So there you have it, her completed nursery! I love sitting in here and imagining what life will be like when she comes. I was just telling Josh, it's the only room in the house that is completely designed the way I want it to be. Reese, now it's time to come baby girl. We're ready for you!
Linking here-
Classy Clutter
Sew Chatty
Home Stories A to Z